
Collect memos and hand them over
Write instructions and requests into the Memo queue as they occur to you, and hand them to a session or an assistant later, all at once. Jot them down on your phone on the move and hand them over from your PC, for example.
How it works
Section titled “How it works”| What you do | What the agent does |
|---|---|
| Collect memos | Nothing. A memo reaches no one until you send it |
| Have an assistant tidy them, if you like | Turns the jottings into clear instructions and suggests categories. Nothing changes until you apply it |
| Pick a destination and send | The session or assistant you picked receives the memos as one message |
Memos are stored on the server, so the same queue shows on another PC or your phone.
Write a memo
Section titled “Write a memo”- Press + (“Add memo”) in the header of the Memo queue section in the left pane. From the keyboard, Alt+A, or the leader key (Ctrl/⌘+K) followed by M, opens it too
- Write in “Add a quick memo… (send them together later)”. Put a group name in “Category (optional)” if you like
- Add it with “Add” (or Ctrl+Enter). Esc closes the box
- Attach images by pasting or dropping them into the box, or with the attach button
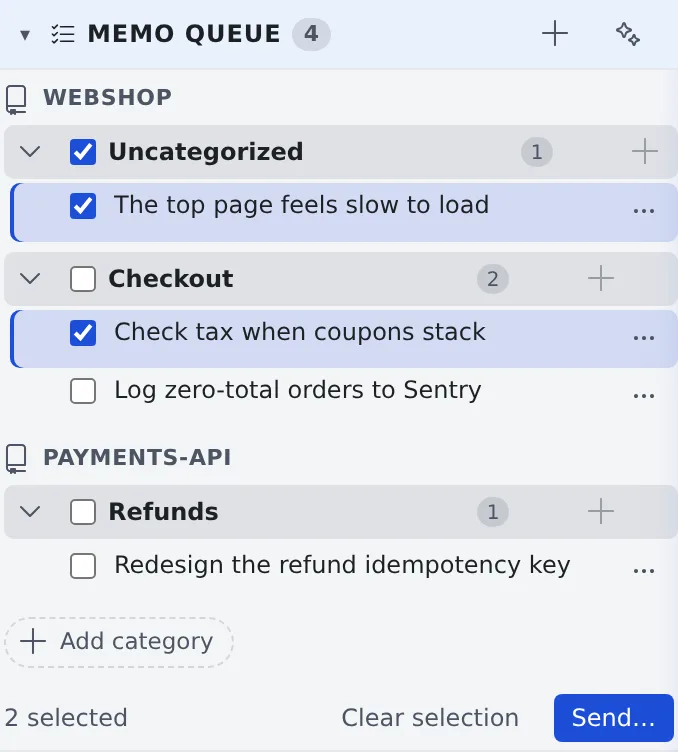
- Memos are grouped by repository, and by category within it
- Press + on a category header to write straight into that category. “Add category” creates one ahead of time
- The send button of an open file can also “Add to queue” a memo about that file (Hand a file to a session)
- “Save to memo” on the “Start working” screen moves the prompt you are writing, attachments included, into the memo queue and clears the box. “Start with this” in the memo’s ⋯ brings it back, and the memo goes away once the session starts
Read and edit memos
Section titled “Read and edit memos”- The body is cut to two lines. Press it to open the whole text, and press again to edit (Ctrl+Enter saves, Esc cancels)
- “Collapse” under the body goes back to two lines
- The row’s ⋯ (or a right-click) offers “Edit”, “Send this memo”, “Copy” and “Delete”
- Drag to reorder memos or move them to another category. Press a category’s name to rename it. Deleting a category moves its memos to “Uncategorized”
Have an assistant tidy them
Section titled “Have an assistant tidy them”- Tick the memos to tidy
- Press ✨ (“Organize the selected memos with an assistant”) in the header. The workspace has to be running
- The “Tidy with assistant” screen lists the rewritten instructions and the suggested categories
- Choose the suggestions to apply and press “Apply ◯ item(s)”. The memos do not change until you press it
Send them together
Section titled “Send them together”-
Tick the memos to send and press “Send…” at the bottom. “Send” on a category header sends that whole category
-
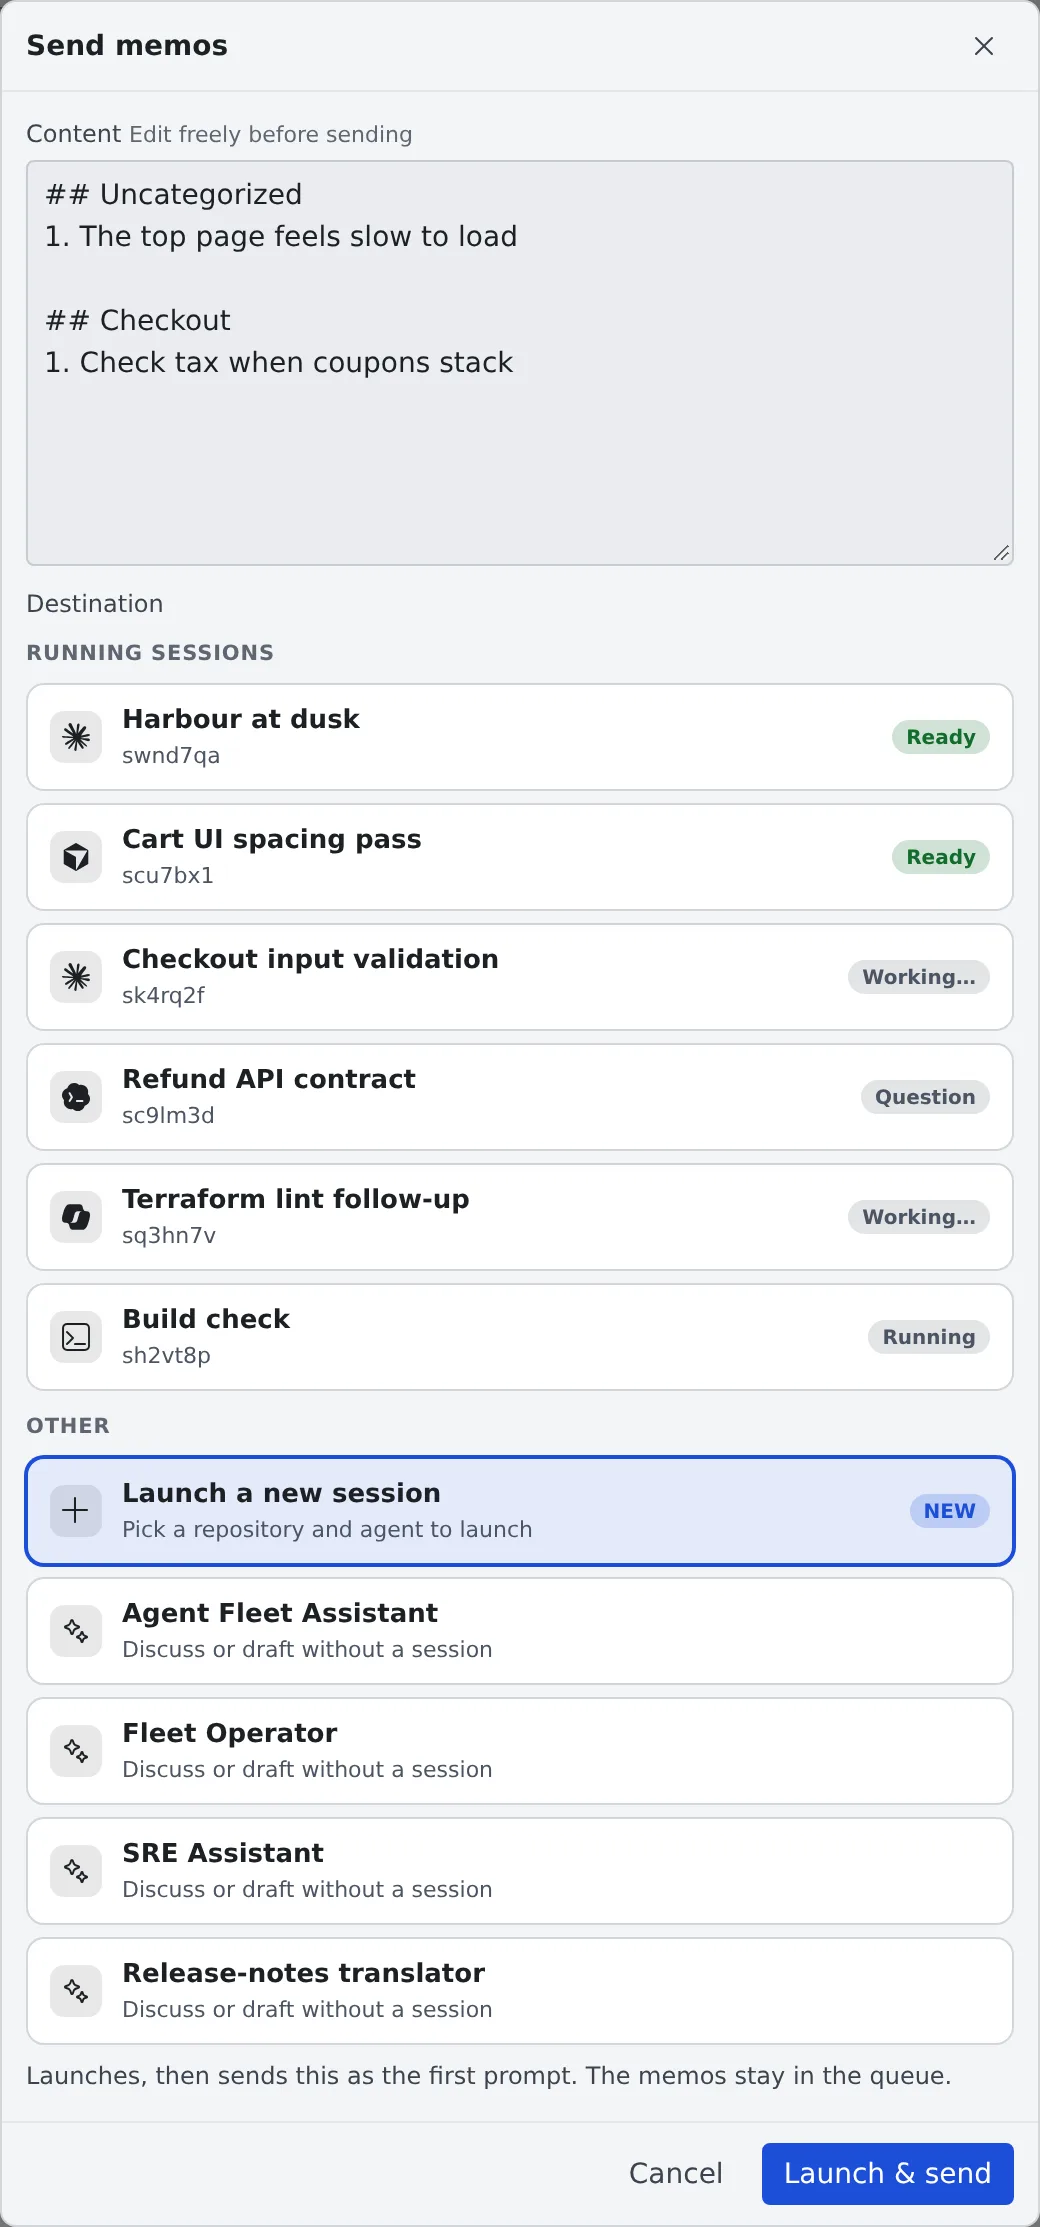
Check the Content on the “Send memos” screen. You can rewrite it freely before sending
-
Pick a Destination and send
| Destination | What happens |
|---|---|
| Running sessions | Sent on the spot. The memos are marked “Sent” and stay in the queue for 7 days |
| Launch a new session | “Launch & send” opens the screen where you pick the repository and agent, with the content as the first prompt. The memos stay in the queue |
| An assistant | A new chat with that assistant opens with the content in the input box. Check it and send. The memos stay in the queue |
- Several memos sent together become one message, with a heading per category (
## …) and numbers from1. - A single memo is sent as its bare text
- A memo never goes anywhere on its own, such as to someone’s mail. It reaches only the destination you pick when you send it
Memos taken in from the inbox
Section titled “Memos taken in from the inbox”A memo taken in from an inbox recipe is marked “Inbox: …” (Ask a teammate through the inbox).
- It is never joined to your own memos: each is sent on its own, with its origin
- Selected together with your own memos, it can go only to a running session
- Started alone in a new session, that session is marked as coming from the inbox in the left pane
Related
Section titled “Related”- Ask an assistant: the assistants you can hand memos to
- Start a session: launch a session with a memo as the first prompt
- Ask a teammate through the inbox: take an inbox recipe into your memos