
Commit in the commit graph
Read the history and diffs in the commit graph, then stage files and commit in the Changes pane. Use it to check an agent’s changes and commit them without opening a terminal.
How it works
Section titled “How it works”| What you do | What happens |
|---|---|
| Open the commit graph | The branches and history appear. Click a commit for its diff |
| Stage files in “Changes”, write a message and commit | The commit lands in the working copy |
| Press fetch or Fast-Forward | The remote is fetched, or the branch catches up with its upstream |
Open the commit graph
Section titled “Open the commit graph”Right-click a repository’s row and choose “Open commit graph”.
- Ctrl+click (⌘+click on a Mac) or middle-click the row to open it in a new pane
- A plain click on the row expands or collapses the sessions and worktrees under it
The header shows the current branch and these buttons. When space is tight they fold into ⋯.
| Button | What it does |
|---|---|
| Changes | Opens the “Changes” pane for committing, in a separate pane |
| fetch | Fetches the remote (git fetch --prune) |
| Fast-Forward | Fast-forwards the current branch to its upstream (pull --ff-only) |
| Refresh | Refreshes the view |
- Click the branch name to open “Switch branch”. It filters, and lists the newest commits first
- With a
.gitmodules, the header’s target selector lists the submodules. Pick a fetched one to see that submodule’s commit graph. Unfetched ones are marked “(not fetched)” and cannot be picked
Stage and commit changes
Section titled “Stage and commit changes”- Press “Changes”. The “{repository name} — Changes” pane lists the changed files
- Use each row’s buttons to “Stage” and “Unstage”
- Write in “Commit message” below. To include every tracked file, tick “Stage all tracked (-a)”
- Press “Commit”
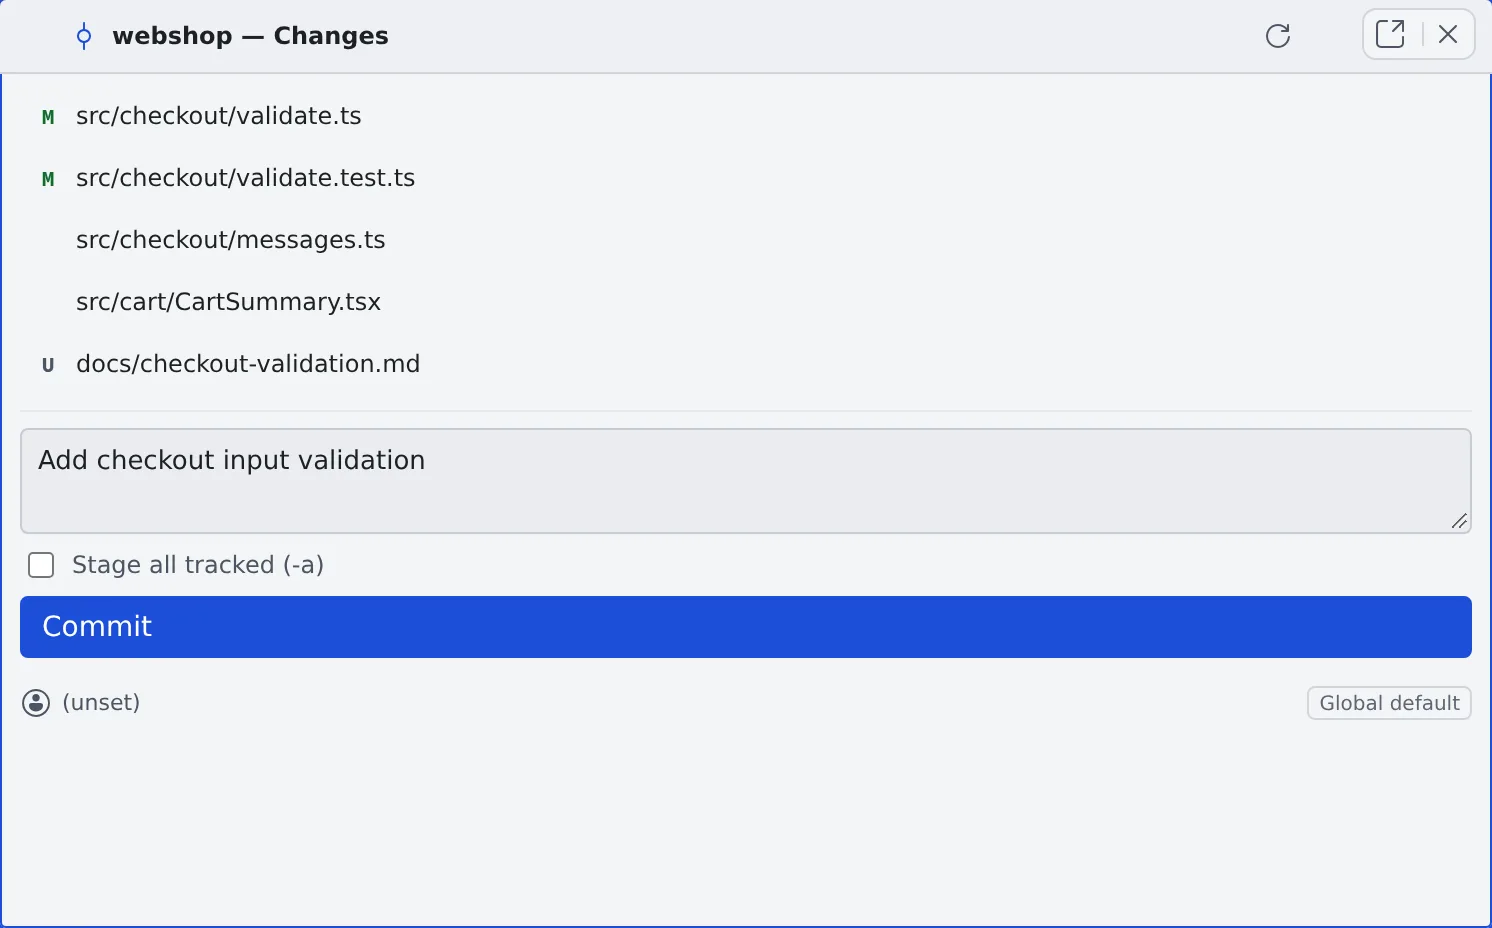
- The “Stage” and “Unstage” buttons appear when you hover over a row
- Tracked files can also be “Discard changes”d. They go after a confirmation and cannot be brought back
- With an empty message you see “A commit message is required”
Change the commit author
Section titled “Change the commit author”The Changes pane shows the current commit author. Click it for “Change committer (override for this repo)” and set a name and email for this repository only.
- The author is decided in the order “Repo override” → “Provider default” → “Global default”
- “Clear” goes back to the provider default
- The provider and global defaults are in ⚙ Settings → “Git hosting” (Connect a Git service)
Read the history and diffs
Section titled “Read the history and diffs”Click a row of the commit graph to see that commit’s changed files and diff.
- Diffs fold per file. Change how they look with “Expand all”, “Collapse all” and “Wrap”
- Right-click a commit for this menu
| Item | What it does |
|---|---|
| Show details | Opens that commit’s diff |
| Start work on {branch}… | Starts work in a working copy of that branch’s own |
| Switch branch: {branch} | Switches the current working copy to that branch |
| Switch to remote branch: {branch} | Switches to the remote branch |
| Check out (detached HEAD) | Checks out that commit |
| New branch from this commit… | Creates a branch from that commit and switches to it |
- A branch used by another working copy shows “{branch} is in use by {folder}; open it”, which opens that working copy
When it goes wrong
Section titled “When it goes wrong”“Check out commit” fails
Section titled ““Check out commit” fails”It can fail when there are uncommitted changes. Commit them, or clear them away, first.
Related
Section titled “Related”- Launch a session from a repository: the rest of the right-click menu, and the row’s badges
- Connect a Git service: pushing and the commit author